


Save time on arrival
Skip the queues at Suvarnabhumi
Most readers pre-book at least one of these before they fly. Cheapest options listed below — full picks at the bottom of the page.
The 11-hour flight is the easy part. Arrival at Suvarnabhumi is where most first-time visitors get caught out — by the TDAC if they haven’t filled it in, by the wrong taxi queue, by skipping the SIM card and then finding their phone won’t work for Grab.
Here’s what actually happens from wheels-down to your hotel, with the decisions that save you time and money.
Bottom line: Two pre-bookable services slash arrival friction. Klook fast-track immigration ($45) cuts the 30-60 minute peak-hour queue to under 10. A pre-booked private transfer ($50) means a driver meets you at arrivals with a name sign — no taxi rank, no scams.
At a glance — your first 90 minutes
| Step | Typical time | Notes |
|---|---|---|
| Gate → immigration | 15-20 min | Travelators throughout; long walk from concourses D-G |
| Immigration (manual) | 20-60 min | Worst at 06:00-09:00 and 19:00-23:00 |
| Immigration (e-gate) | 5-10 min | Eligible nationalities only — much faster |
| Baggage claim | 15-45 min | Belts active within 20 min of landing |
| Customs (green channel) | 1-2 min | Usually waved through |
| Arrivals hall → hotel transport | 5-15 min | Walk to taxi rank, ARL, or pre-booked driver |
| Total | 60-130 min | 30-60 min with fast-track |
Before you land
Get these done in the air or before takeoff:
- Fill in the Thailand Digital Arrival Card (TDAC) if you haven’t already. It’s mandatory. Do it on your phone via official portal using the Wi-Fi at your departure airport. You need your passport, flight number, and the first night’s hotel address. Save the QR code as a screenshot — you’ll be asked for it.
- Note down your hotel address in Thai if you have it. Even with Grab, drivers sometimes need to call to confirm the location and Thai script helps. Most hotels list their Thai address on their website.
- Check your phone for eSIM — if you’ve installed one, activate it now (most need 30 minutes to provision). Saves the SIM-counter queue on landing.
- Last toilet break before landing — Suvarnabhumi’s nearest restrooms to immigration are a 200m walk after deplaning. Long queues form for both.
On the ground: the arrival sequence
The walk from gate to taxi typically takes 45-90 minutes. Here’s each step.
1. Gate to immigration
Suvarnabhumi has seven concourses (A-G). Concourses A and B are international and feed directly into the central immigration hall. From other concourses you’ll take a short internal train (less than 5 minutes).
There are travelators throughout but the walk is still 800m-1.5km depending on your gate. Allow 15-20 minutes.
2. Immigration
Two queue options:
- Manual counters — the long lines. 20-60 minute wait depending on time of day. Morning (06:00-09:00) and late evening (19:00-23:00) are the worst.
- Thai Automatic Channels (e-gates) — eligible nationalities can use the e-gates. UK, US, Canada, Australia, NZ, Singapore, Japan, South Korea, Germany, France, Italy, Spain, and most EU passports are eligible. Look for the “Automatic Channel” lanes — they’re typically 5-10 minutes.
You’ll need:
- Passport (with at least 6 months validity remaining)
- TDAC QR code on your phone
- Onward/return ticket if asked (rare, but possible)
Some travelers get a stamp; e-gate users get a printed entry slip. Either way, you’ll be in for 60 days visa-free if you’re from a covered country.
Skip the queue: 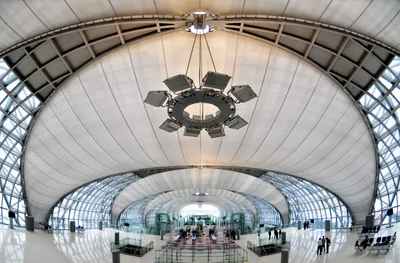 Klook Suvarnabhumi VIP fast-track from $45 — a staff member meets you at the gate and escorts you through the Premium Immigration Lane. The typical 20-60 min morning queue becomes 5-10 min. Worth it when six long-haul flights land together. Book on Klook →
3. Baggage claim
Baggage claim is on Floor 2, signed clearly after immigration. Belts are typically active within 15-20 minutes of landing but can take up to 45 minutes for late arrivals.
There are luggage trolleys (free) at the entrance to the baggage hall. Take one if you have more than one bag — the walk out is long.
4. Customs
After collecting bags, walk through the green channel (nothing to declare) unless you’re carrying restricted items. Customs officers occasionally ask to scan bags; usually they don’t.
Watch out: Electronic vapes and e-cigarettes are illegal in Thailand — possession alone can mean a 30,000 THB fine. Leave them at home. Also restricted: cigarettes over 200 sticks, alcohol over 1 litre, fresh food, drone equipment (requires a permit).
5. Arrivals hall
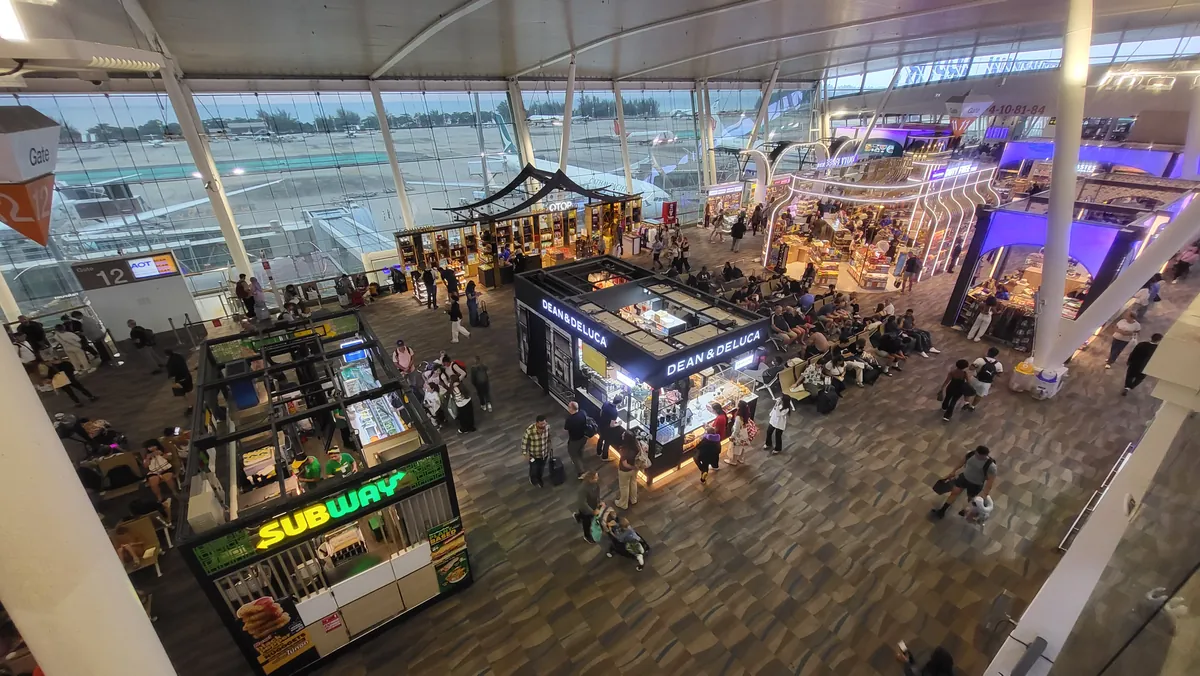
Past customs, you enter the public arrivals hall. This is where:
- SIM card counters (AIS, DTAC/TRUE) sell tourist SIMs from 49 THB. If you didn’t get an eSIM, this is the place to buy one before leaving the airport.
- Currency exchange booths offer poor rates — use an ATM instead.
- ATMs are available — Bangkok Bank and Krungsri ATMs are next to the exits. Withdrawal fee is 250 THB (Visa) or 350 THB (Mastercard) per transaction; take out the max (typically 30,000 THB) to minimize the fee impact.
- Tourist information can advise on transport — they’re occasionally useful for early-morning arrivals when transport options are limited.
Getting to your hotel
Four options ranked by cost and convenience:
| Option | Cost | Journey time | Pickup |
|---|---|---|---|
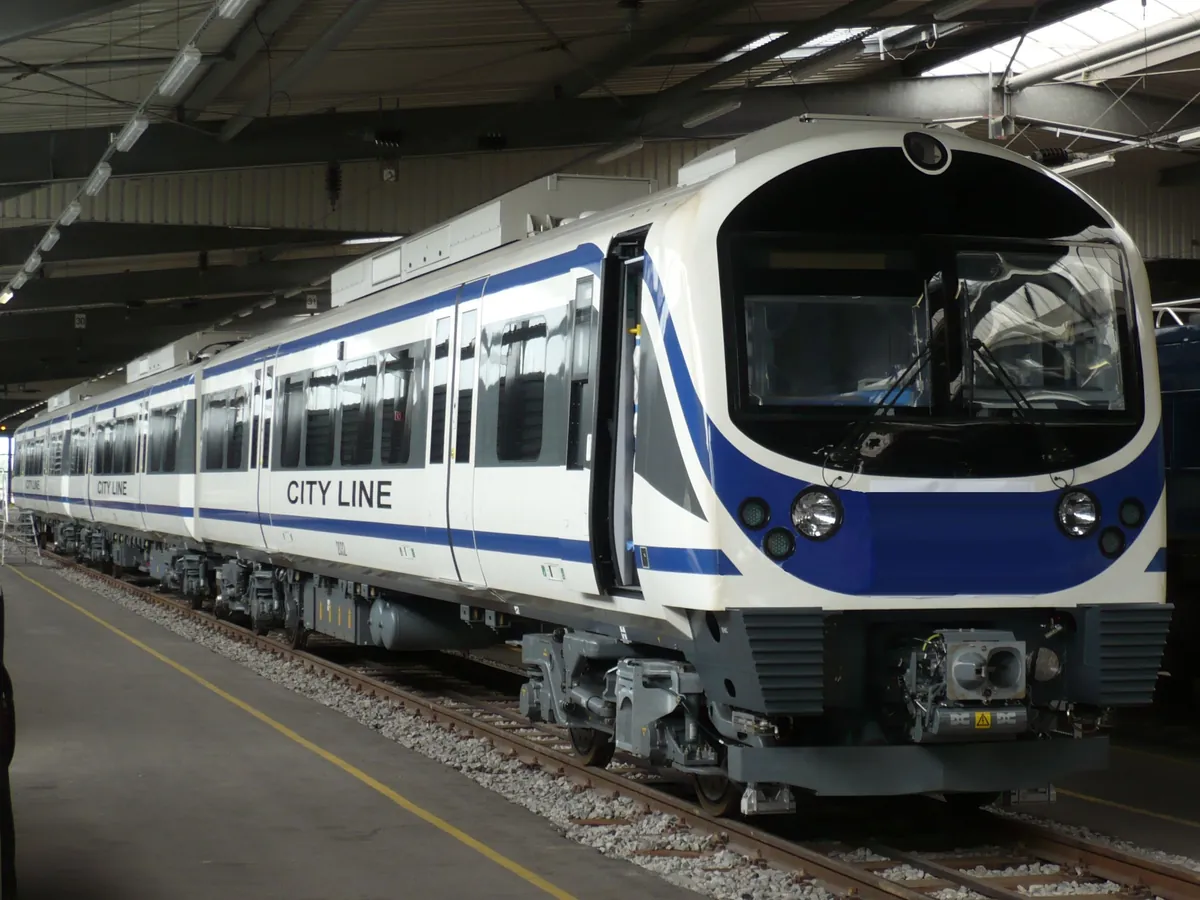
| Airport Rail Link City Line | 45 THB | 30 min to Phaya Thai | Floor B (basement) |
| Grab | 350-550 THB | 40-90 min | Floor 2 (departures level, north end) |
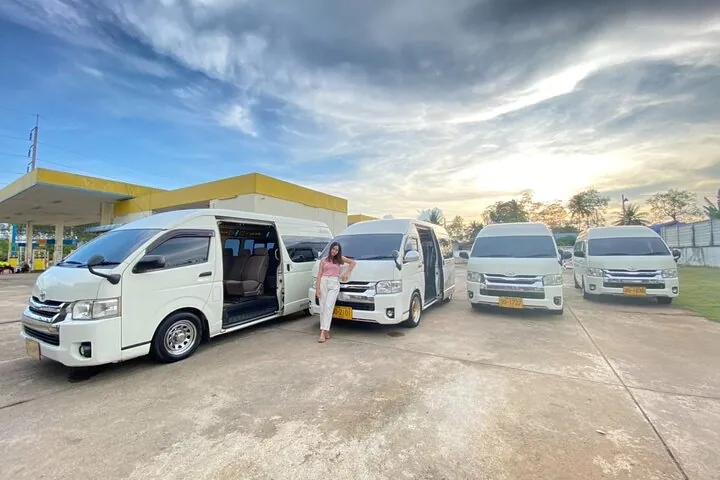
| Metered taxi | 300-500 THB | 40-90 min | Floor 1 (signed taxi rank) |
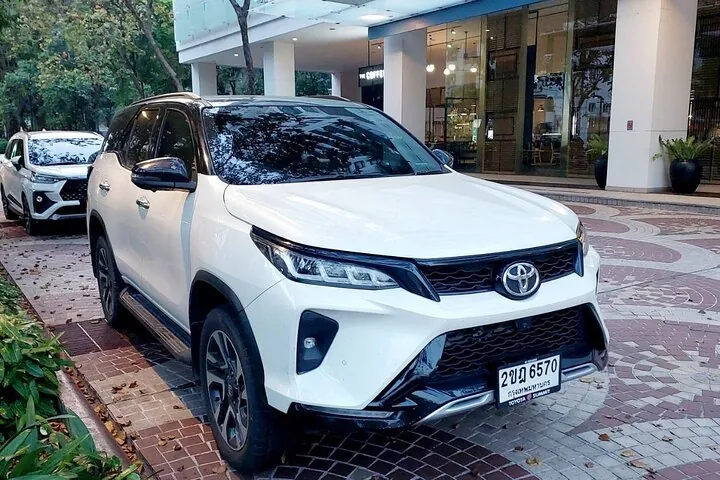
| Private transfer (pre-booked) | 800-1,500 THB | 40-90 min | Floor 2 (arranged pickup) |
Which one should you take?
- ARL is the fastest in evening traffic (no road, just the rail line direct to Phaya Thai BTS)
- ARL is the cheapest at 45 THB
- Metered taxi is the cheapest door-to-door option (300-500 THB)
- Grab gives you a fixed fare upfront — no negotiation, no meter games
- Pre-booked private transfer is the smoothest experience — driver meets you with a sign
- ARL requires walking + escalators + BTS transfer — not ideal with heavy luggage or kids
- Taxi rank queue can hit 30-45 min on busy days
- Grab pickup is on Floor 2 (departures) — confusing for first-time arrivals
- Private transfers cost 2-3× a metered taxi but you skip every queue
Avoid:
- Touts in the arrivals hall offering “private taxi” or “limousine” — they’re 800-1,500 THB and won’t be cheaper. Polite “no thank you” works.
- Private cars on Level 4 (departures) — these are the “airport limousine” desks. Three times the price of a metered taxi for the same journey.
Full breakdown of options and prices in our airport transfers guide.
Save time:  Klook Airport Rail Link ticket from $4 (4.8★, 15k+ reviews) — pre-buy and skip the ticket-machine queue. Pickup at the Klook counter on B Floor, right next to the train. 30 minutes to Phaya Thai BTS interchange. Book on Klook →
Pre-book it:  Private Bangkok airport transfer from $50 (Viator) — driver meets you at arrivals with a name sign, fixed price to your hotel, no taxi rank or negotiation. Best for late arrivals or anyone with a lot of luggage. Book on Viator →
Scam warnings
The risks at Suvarnabhumi are mild compared to street-level Bangkok, but two are worth knowing:
- The “your hotel is closed/full” scam — A driver claims your booked hotel is unavailable and offers to take you to “a better one.” This is a commission scam. Insist on going to your booked address; if the driver refuses, get out and find another.
- Currency exchange touts offering “best rate” — Stay with bank-branded ATMs or the official SuperRich counter downtown. Anyone approaching you with a rate is overcharging.
Insider Tip: If you’re greeted in the arrivals hall by anyone holding your name or your hotel’s name — and you didn’t pre-book a transfer — ignore them. It’s almost always a commission tout. Real hotel transfers go straight to the kerb to wait at a pre-arranged spot, not the arrivals hall.
First-hour checklist
Things to do in your first hour on the ground:
- Activate your eSIM if you haven’t (or buy a SIM at the AIS counter)
- Withdraw 10,000-30,000 THB from a bank ATM (Bangkok Bank, Krungsri, or KBank)
- Open Grab and verify you can request a ride before you walk to the taxi rank
- Screenshot your hotel address in Thai if your phone has data — paste from the hotel’s website
- Drink water — you’ll be dehydrated from the flight and Bangkok humidity hits immediately
Pro Tip: The airport ATM withdrawal fee is 250 THB for Visa or 350 THB for Mastercard per transaction regardless of amount. If you need 20,000 THB for the first few days, take it all out in one withdrawal instead of multiple smaller ones — saves 4-5 fee charges.
Once you’re settled
- Rest before exploring — Sukhumvit/Silom/Khao San are all 30-45 minutes from the airport in evening traffic. Plan a low-key first evening.
- Check meal options near your hotel before going far. Bangkok’s street food scene is everywhere — you don’t need to travel to find it.
- First-day SIM data usage will be high — Google Maps, Grab, hotel check-in confirmations. A 1GB tourist SIM lasts most people 3-4 days; an unlimited eSIM is worth the small premium.
See our things to do in Bangkok guide for day-one ideas, and the getting around Thailand guide for onward travel.
Onward travel
- Bangkok airports guide — BKK vs DMK comparison
- Airport fast-track Thailand — full fast-track + lounge guide
- Thailand airport transfers — every option compared by airport
- Best eSIM for Thailand — providers worth using
Skip the queues at Suvarnabhumi


Suvarnabhumi Airport (BKK) VIP Fast-Track Immigration
From
$45

Private Shuttle SUV Bangkok From or To Airport
1h - 2h
From
$50
We earn a commission on bookings — you pay the same price.
Frequently Asked Questions
How long does immigration take at Suvarnabhumi?
20-60 minutes typically. The morning rush (06:00-09:00) and evening rush (19:00-23:00) are the slowest — six big long-haul flights arrive in tight windows and the queues fill. Off-peak afternoons can clear in 15 minutes. Thai automatic e-gates are available for many nationalities including the UK, US, Canada, Australia, Germany, and Japan.
Do I need to fill in the TDAC before arriving?
Yes — the Thailand Digital Arrival Card is mandatory as of 2025. Complete it online up to 72 hours before flying. You'll need your passport, flight number, and Thailand address (your first hotel is fine). Keep the confirmation QR code accessible on your phone — immigration will scan it.
Where do I get a SIM card or eSIM at Suvarnabhumi?
AIS, DTAC (now TRUE), and TRUE all have counters in the arrivals hall after baggage claim, before customs. Tourist SIMs start at 49 THB for 7 days. For eSIMs you don't need an airport counter at all — activate before landing and skip the queue. See our eSIM guide for the best providers.
What's the fastest way from Suvarnabhumi to central Bangkok?
The Airport Rail Link City Line — 45 THB, 30 minutes to Phaya Thai (BTS interchange). Faster than a taxi during traffic hours. Runs 05:30 to midnight. The platform is on Floor B at the airport, signed clearly.
Are taxi scams a problem at Suvarnabhumi?
The official taxi rank on Level 1 is safe — drivers are required to use the meter and the queue is supervised. Avoid touts approaching you on Level 2 (departures) or in the arrivals hall — they offer flat-fare "limousine" rides at 800-1,500 THB versus a metered 300-500 THB. A simple "no thank you" works.